Managing Posts
Posts allow your council to publish news and updates that appear on your council’s website. You can write rich content, attach photos, and manage your post archive from a single place.
Creating a Post
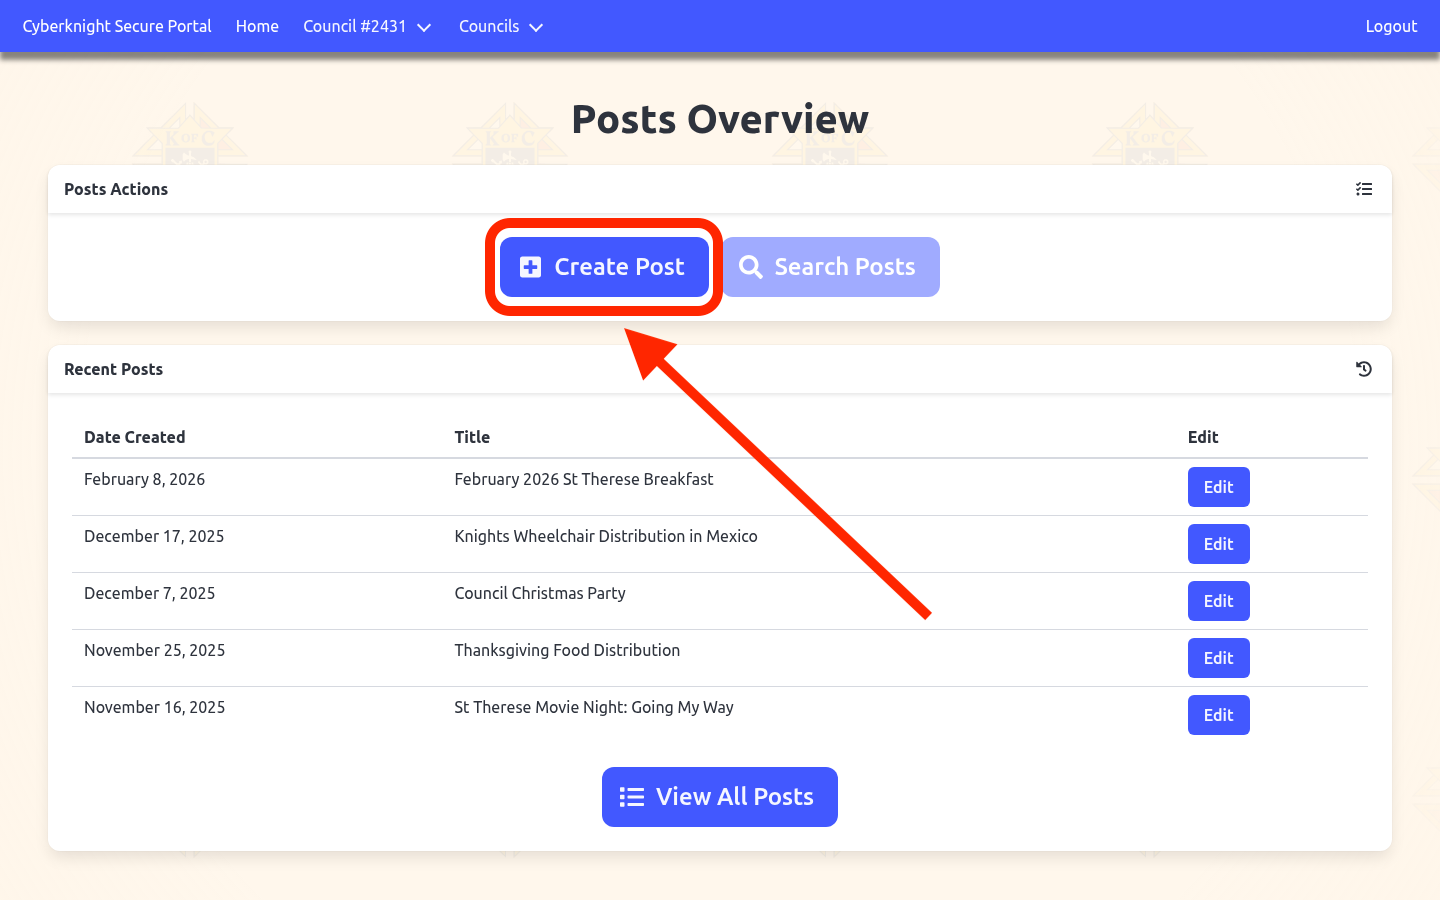
Step 1: Open the Create Post Page
From the Posts Overview, click the Create Post button to open a new blank post form.
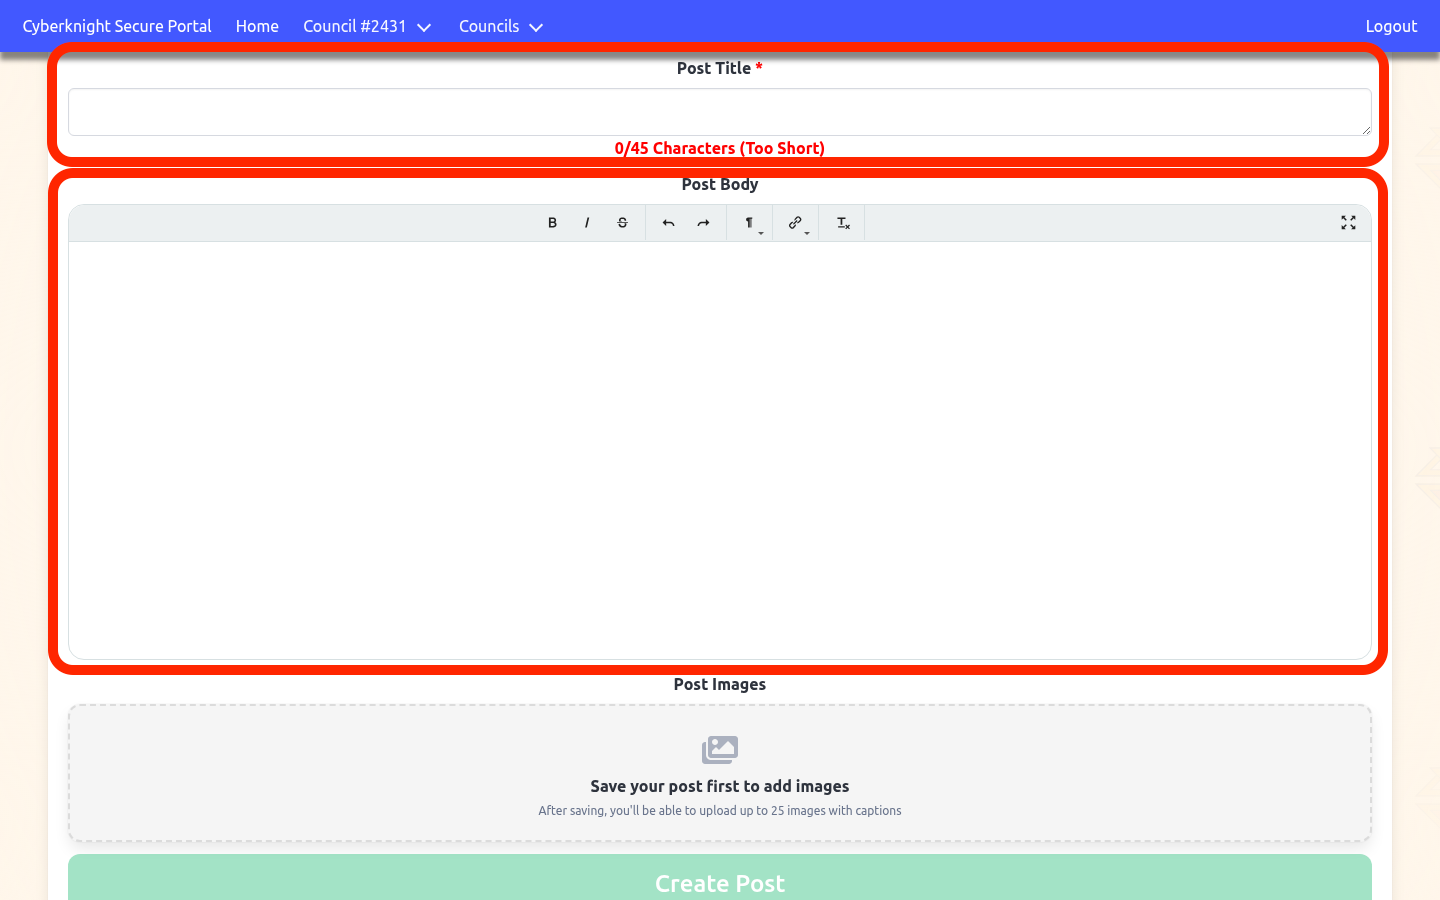
Step 2: Fill in the title and body
Enter a Post Title (up to 45 characters — a live counter tracks your progress) and write your content in the Post Body editor. The editor supports rich text formatting such as bold, italics, links, and lists.
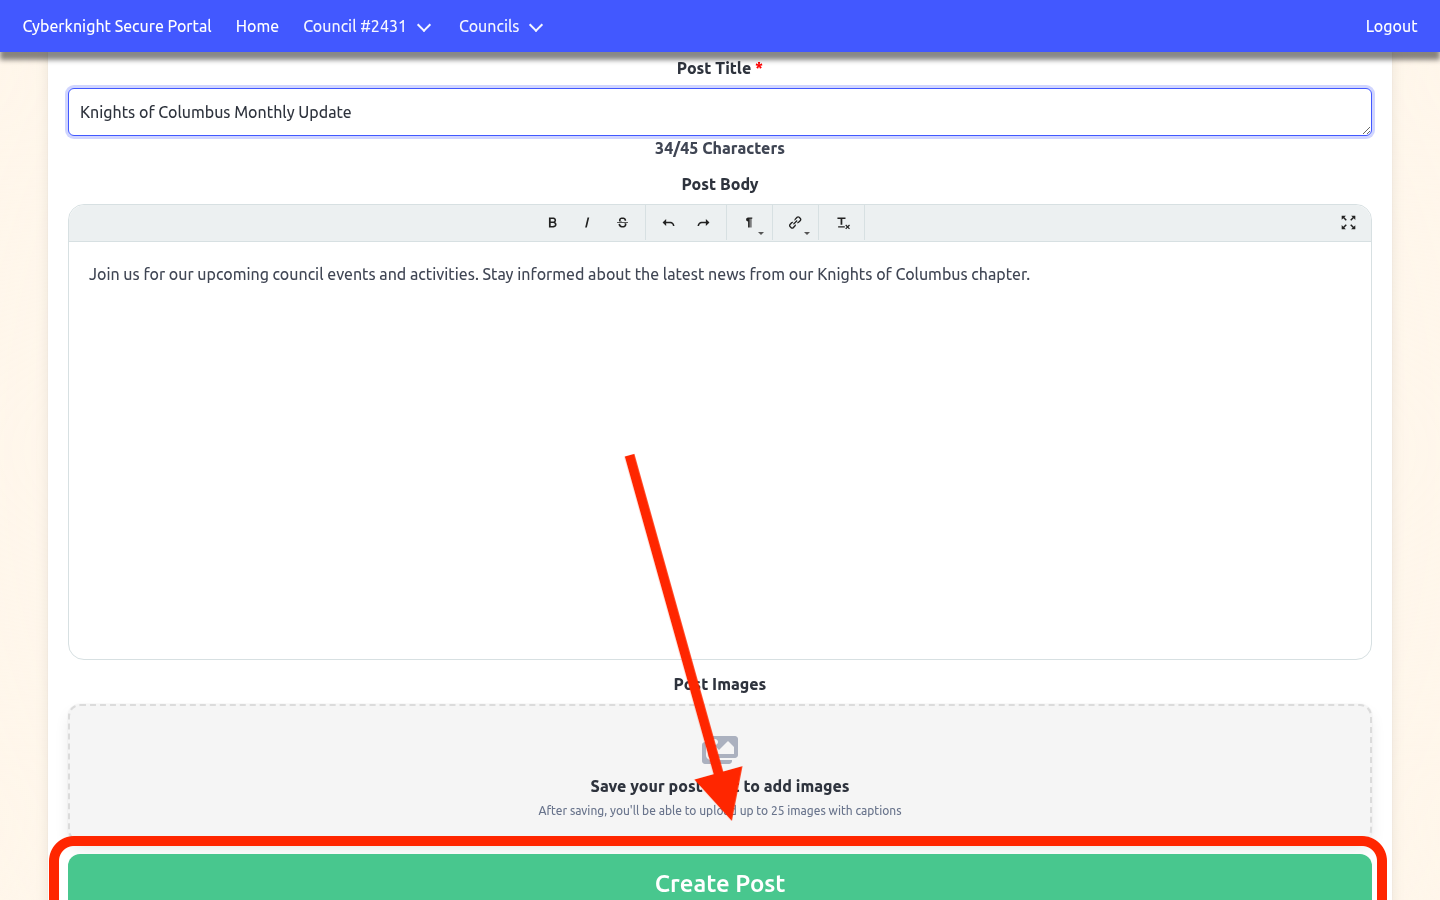
Step 3: Save the post
Click Create Post at the bottom of the form. A loading indicator will appear while the post is saved. Once complete, you’ll be taken to the edit page where you can add images.
Editing a Post and Managing Images
After a post is saved, you can update its title and body, and manage attached images — up to 25 photos per post.
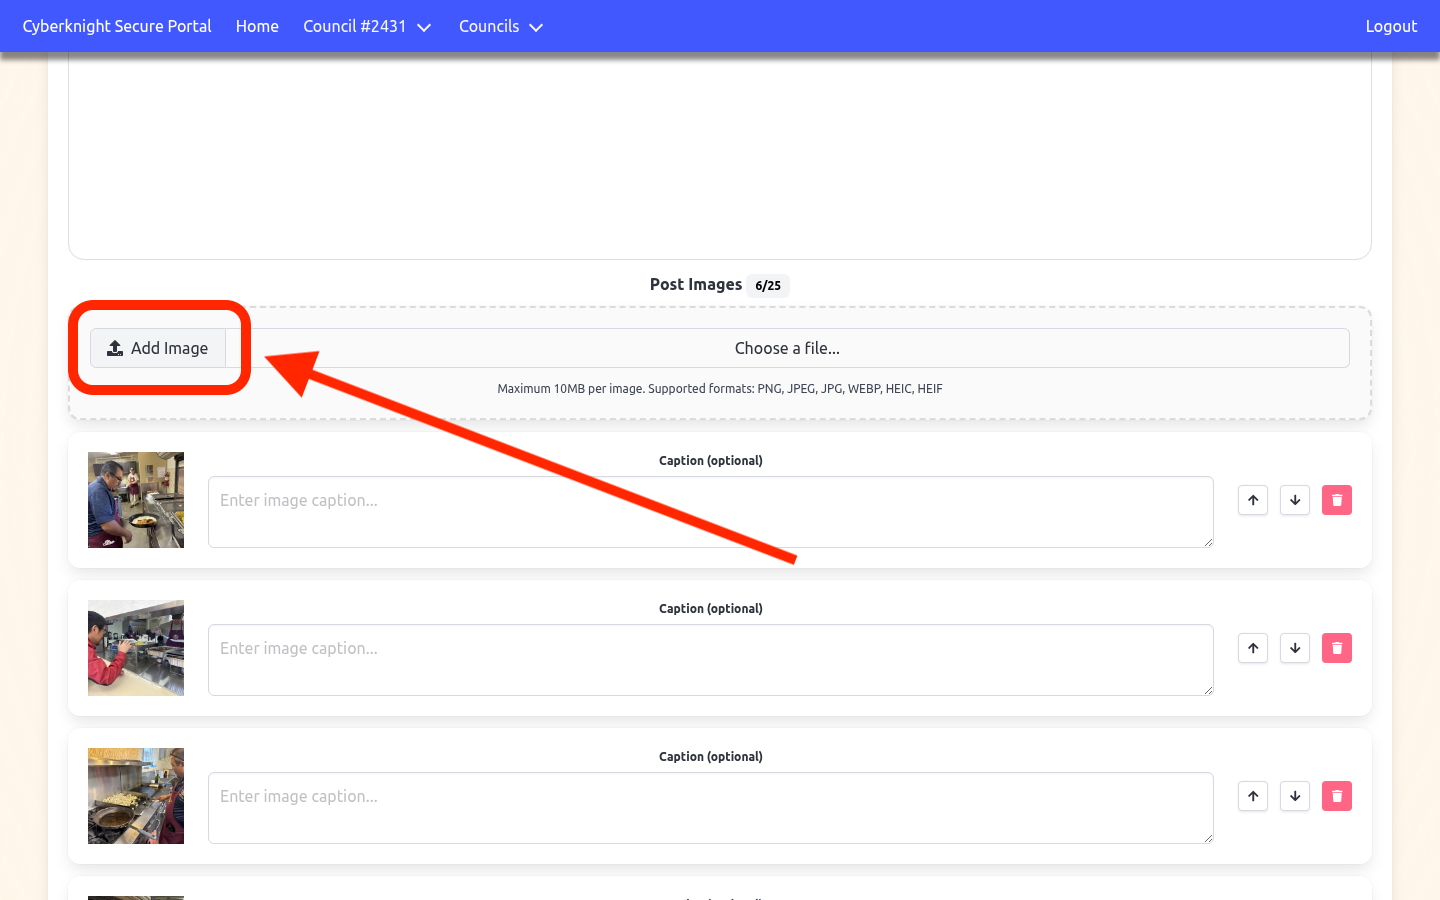
To add an image, click Add Image in the Post Images section and select a file from your device (PNG, JPEG, JPG, WEBP, HEIC, or HEIF — up to 10 MB each). Each image can have an optional caption. Use the arrow buttons to reorder images, or click the trash icon to remove one. Click any thumbnail to preview the full image.
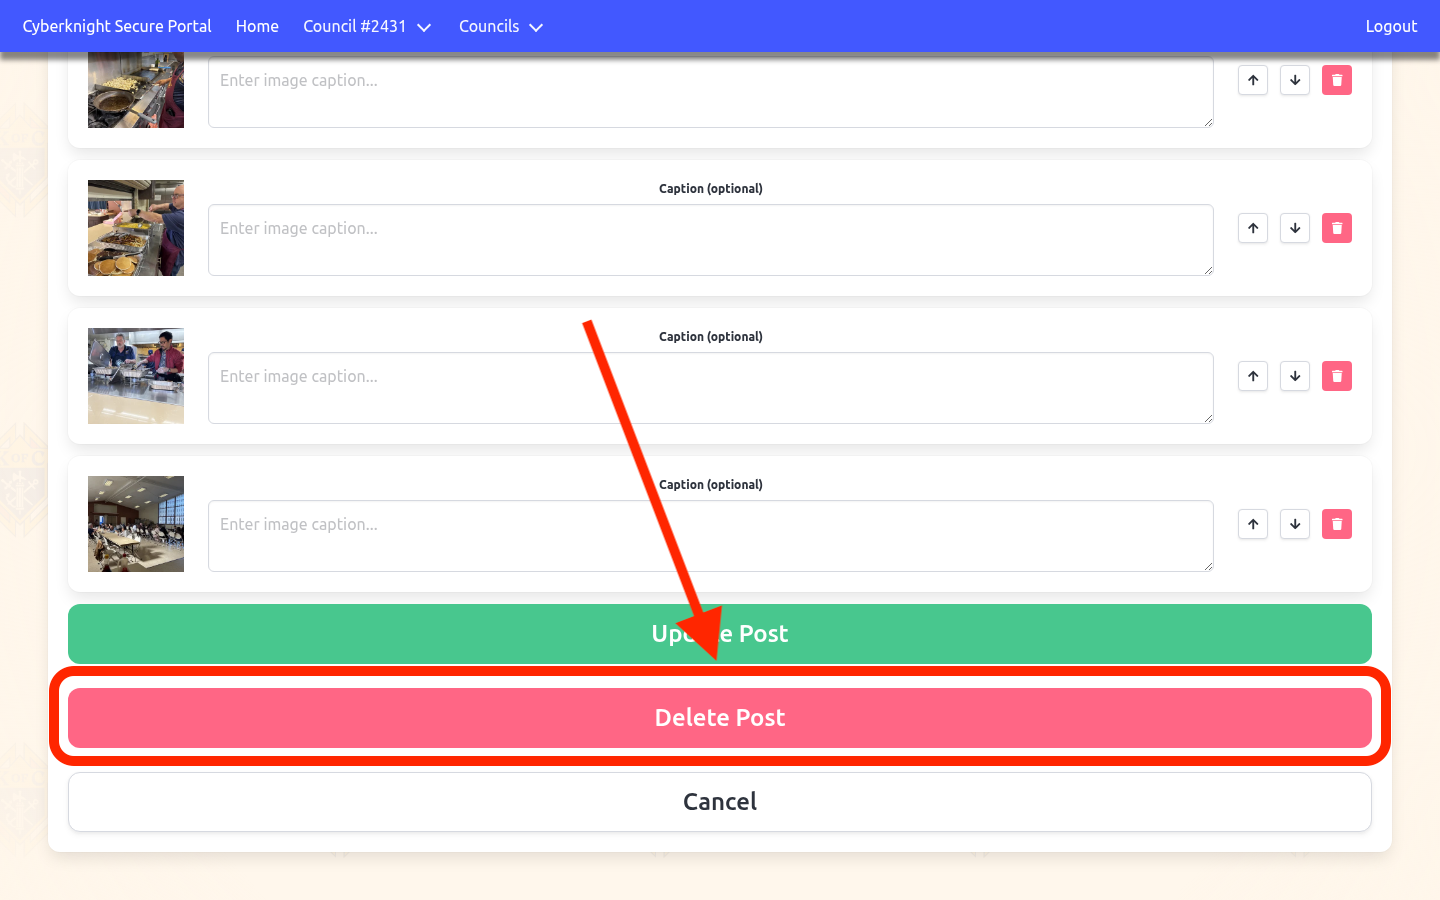
Deleting a Post (Optional)
To permanently remove a post, open it in the edit form and click the red Delete Post button at the bottom of the page. This action cannot be undone.
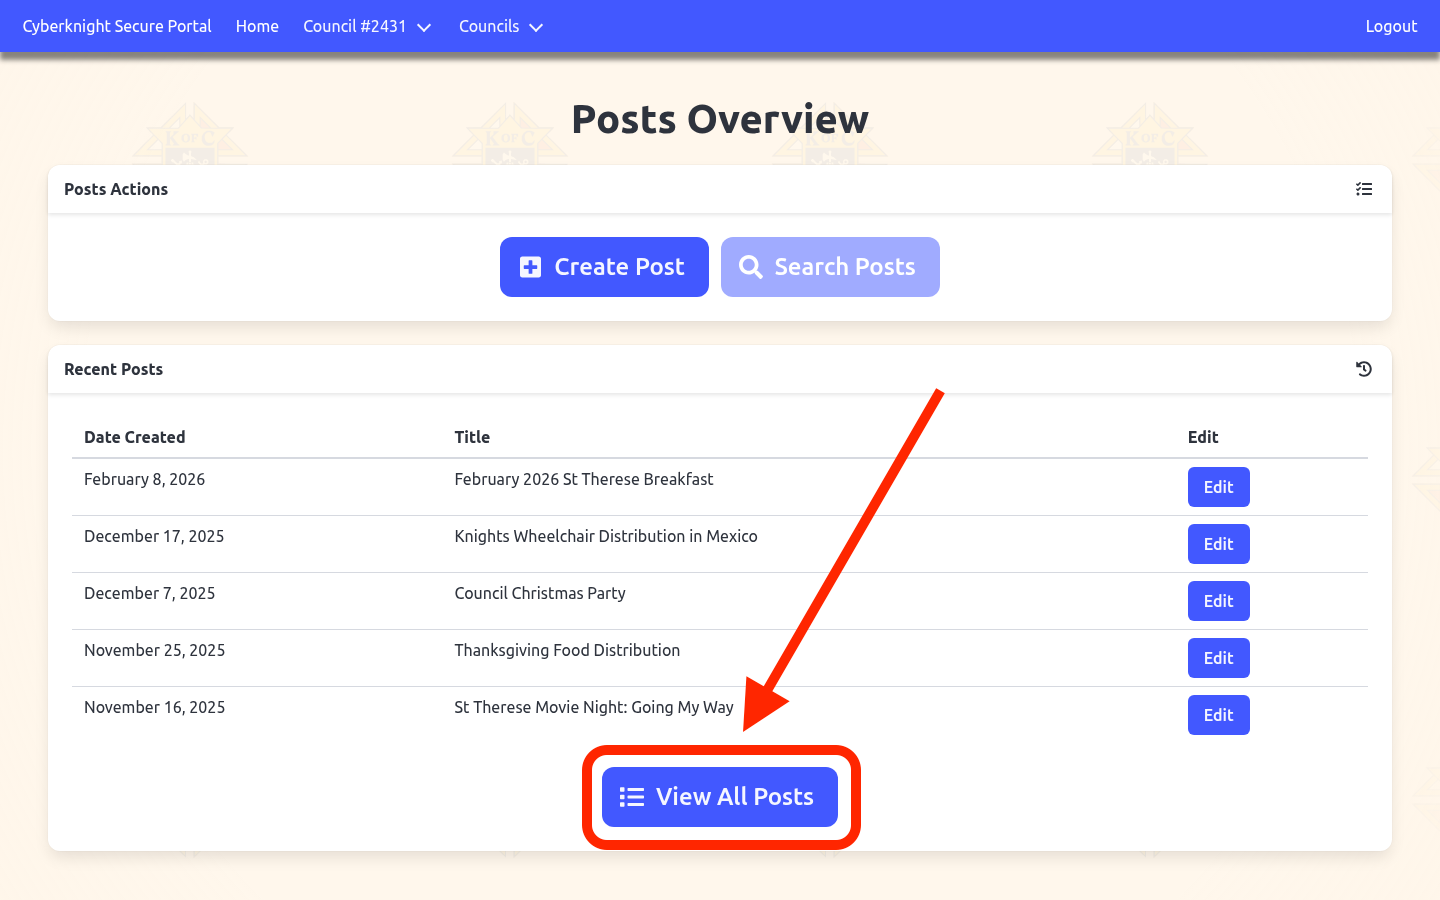
Viewing All Posts
The full post list displays all council posts in a searchable, sortable table. By default it is sorted by most recent first.
The full post list displays all council posts in a searchable, sortable table. By default it is sorted by most recent first.
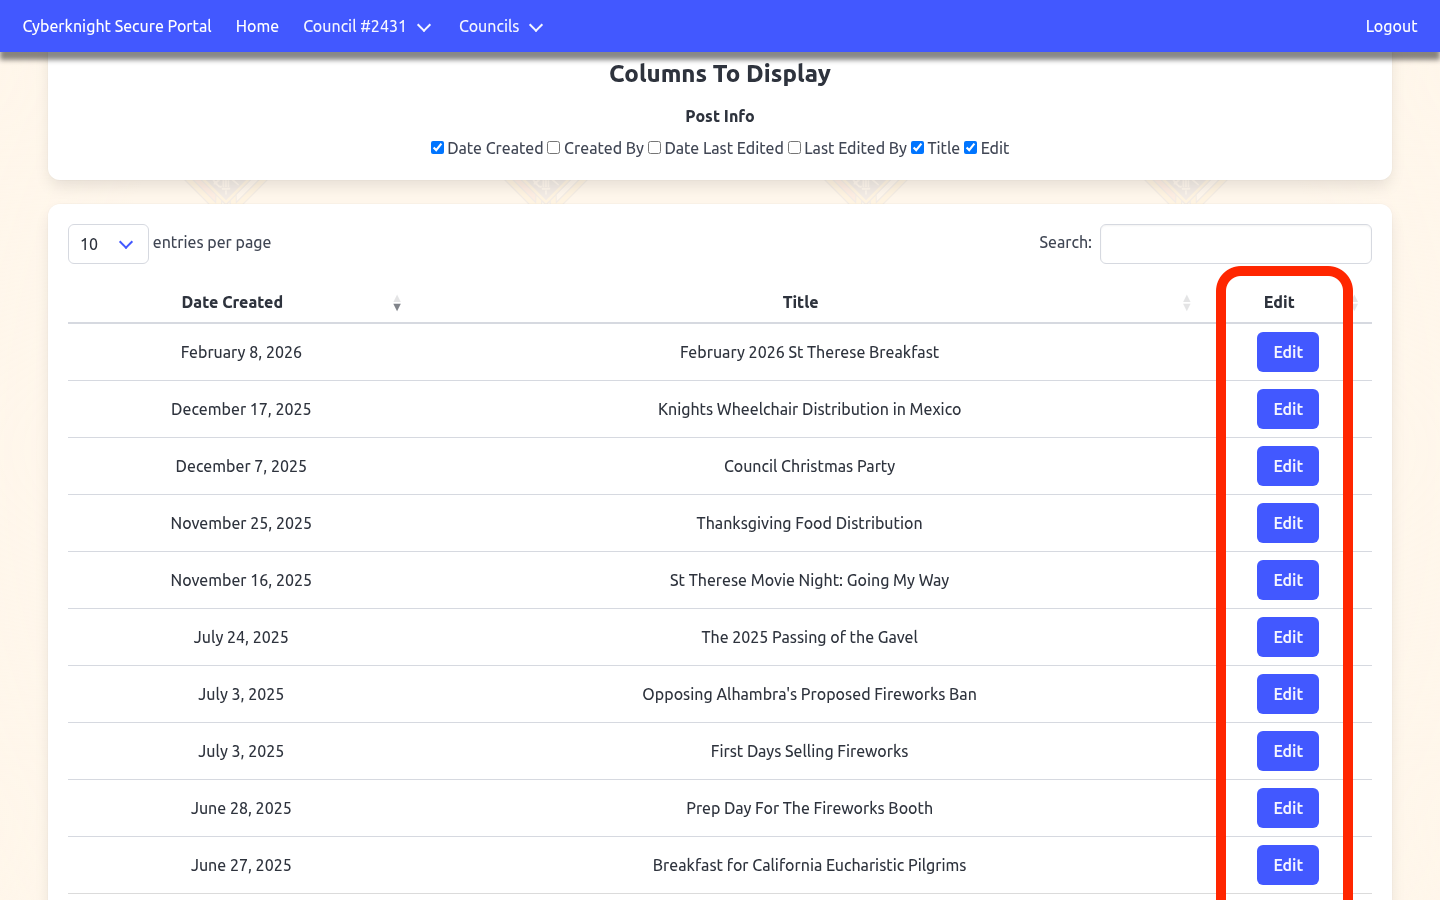
Use the Columns To Display checkboxes above the table to show or hide fields such as Created By, Last Edited, and Last Edited By. Click Edit on any row to open that post for editing.
Tips
- Save before adding images — the image upload section only appears after a post has been saved for the first time
- Use the character counter — the title counter updates as you type to help you stay within the 45-character limit
- Reorder images intentionally — images display in the order shown in the edit form, so arrange them before saving
- Caption your photos — captions are optional but help readers understand what each image shows